

Jack Henry/Banno - Launch From Menu Item
Introduction
This guide is for financial institutions with a Pinwheel integration (henceforth called Pinwheel plugin) on Jack Henry/Banno online banking who wish to allow users to open the Pinwheel plugin from a menu item.
Getting your Pinwheel plugin installed as a menu item involves the following key actions:
- Open the External Application for the Pinwheel plugin
- Locate and copy the second Redirect URI
- Create a new External Application as a "Link Type"
- Save the External Application - you're done!
The steps below walk you through each of these in detail.
1. Open the External Application for the Pinwheel plugin
In Banno People, navigate to the External Applications page. Locate the External Application for the Pinwheel plugin you want to add a menu item for.
2. Locate and copy the second Redirect URI
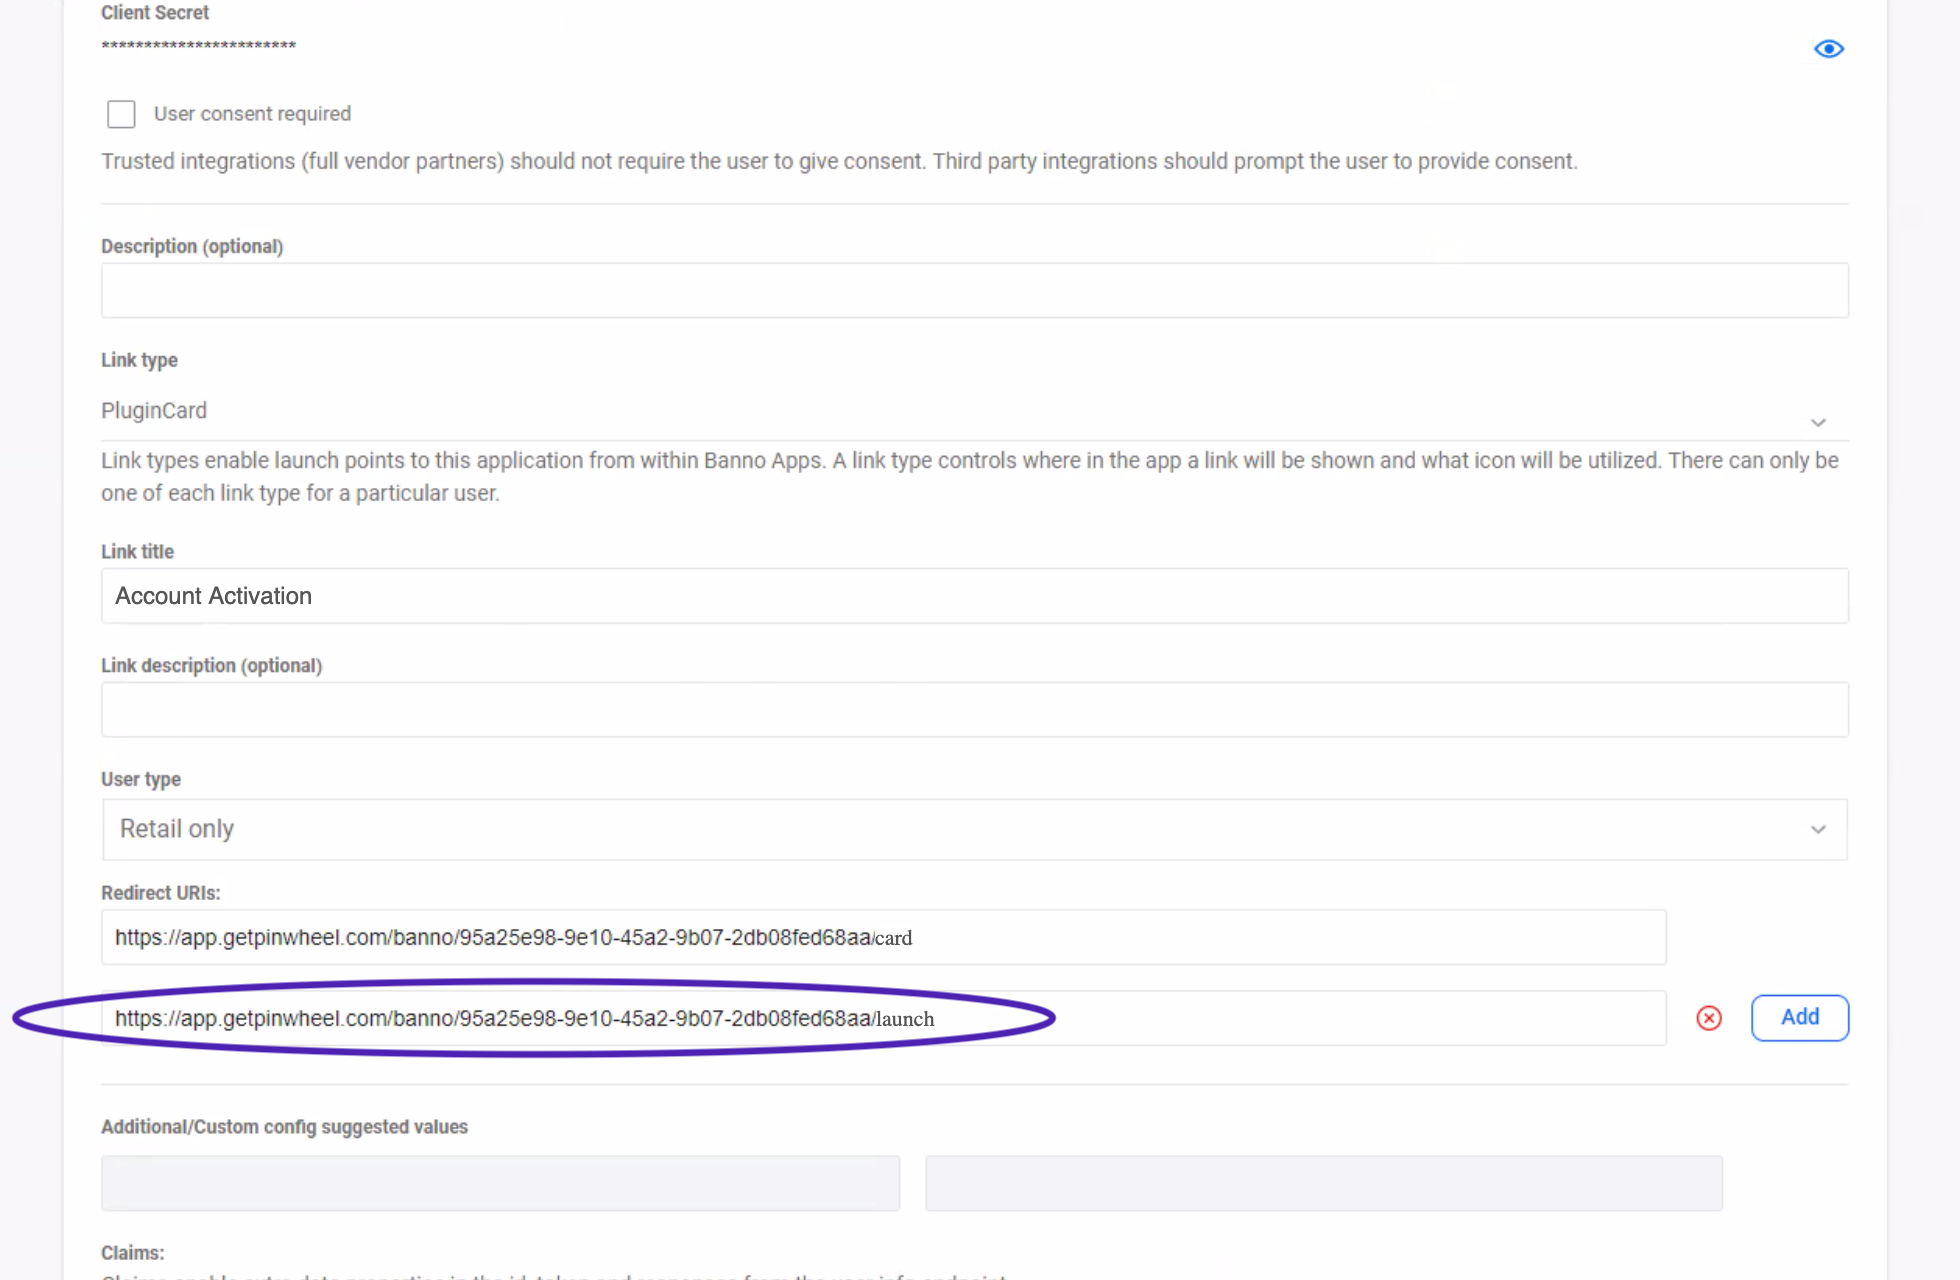
Your Pinwheel plugin requires two Redirect URIs - the first ends with "card" and the second ends with "launch". Copy the second Redirect URI - the one that ends with "launch".
3. Create a new External Application as a "Link Type"
Navigate back to the External Applications page in Banno People and create a new External Application.
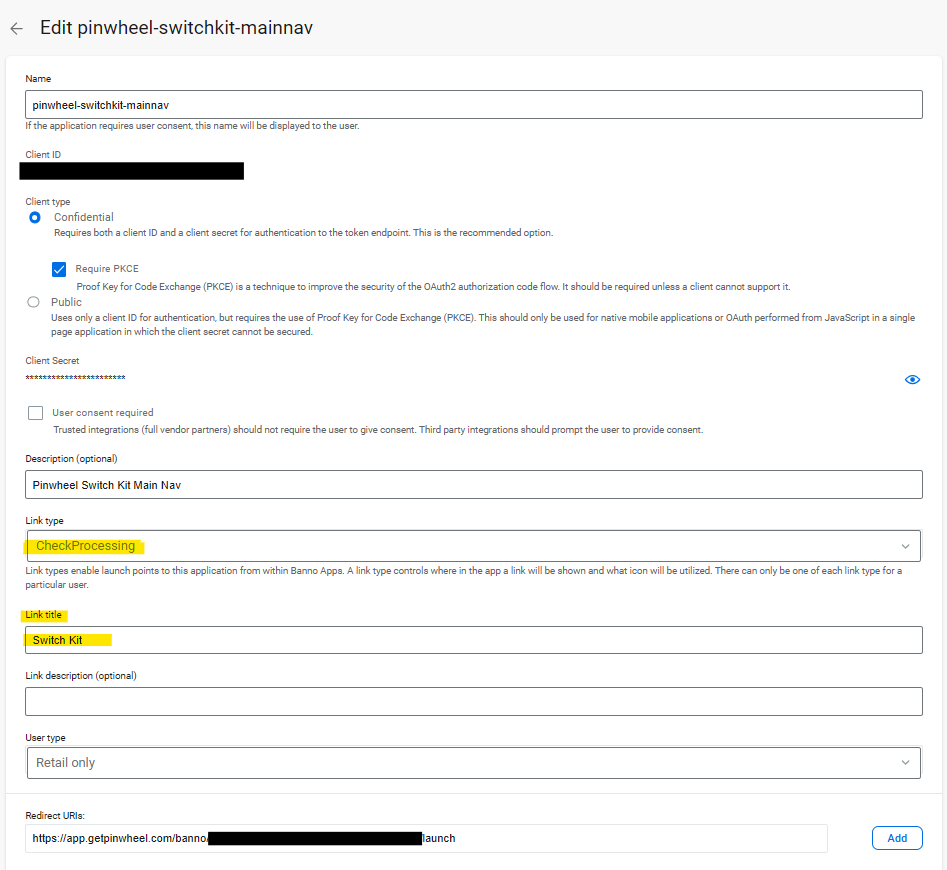
Choose a name that reflects the name of the Pinwheel plugin and conveys that this is just for navigation. The screenshot below is an example of an application created for a Switch Kit plugin. In this case, the customer chose to name it "pinwheel-switchkit-mainnav".
Client type should be "Confidential" and "Require PKCE" should be checked.
You can ignore the Client ID and Client Secret for this External Application.
Redirect URI
This application only needs a single redirect URI - the one you copied in Step 2. Paste that in to the Redirect URI field.
Link Type
The Link type you choose determines where the link is placed in the Banno app which icon will be used for the menu item. See JackHenry's documentation on Link Types for the list of Link Types, where they show up in the app, and which icon is displayed.
As an example, if you choose one of the Main Navigation Links, the menu item will show up in the primary navigation menu found at the top of your web app or be accessible via the menu icon on mobile screens. Most likely, you'll want to choose one of these Main Navigation Link Types.
Each Link Type has its own icon - choose the Link Type associated with the icon you'd like to be displayed. The actual Link Type you choose doesn't matter, so long as you like where the menu item is placed and what icon it displays. You can set your own Link Title (see below).
Link Title
For the Link Title, enter the name of the Pinwheel plugin you chose when you created the original plugin - refer to Step 5 of the onboarding guide (e.g. here for Switch Kit).
Example Configuration
In the sample screenshot below, the customer chose "CheckProcessing", which is a Main navigation link.
4. Save the External Application
When you've given values to all the fields described above, simply save the external application to activate it. Your menu item should now be live!
Updated about 24 hours ago